사용한 환경 AWS(Amazon Linux AMI) + Nginx 1.16.1
Certbot 설치 및 인증서 발급
https://certbot.eff.org/에 접속해 웹서버 환경에 맞게 선택 (Nginx / CentOS6)
(AWS Linux는 CentOS 6버전과 호환된다.)

위에서 환경을 선택하면 해당 환경에 맞는 설치 방법을 확인할 수 있다.
(https://certbot.eff.org/lets-encrypt/centos6-nginx 설명에 따라 설치)

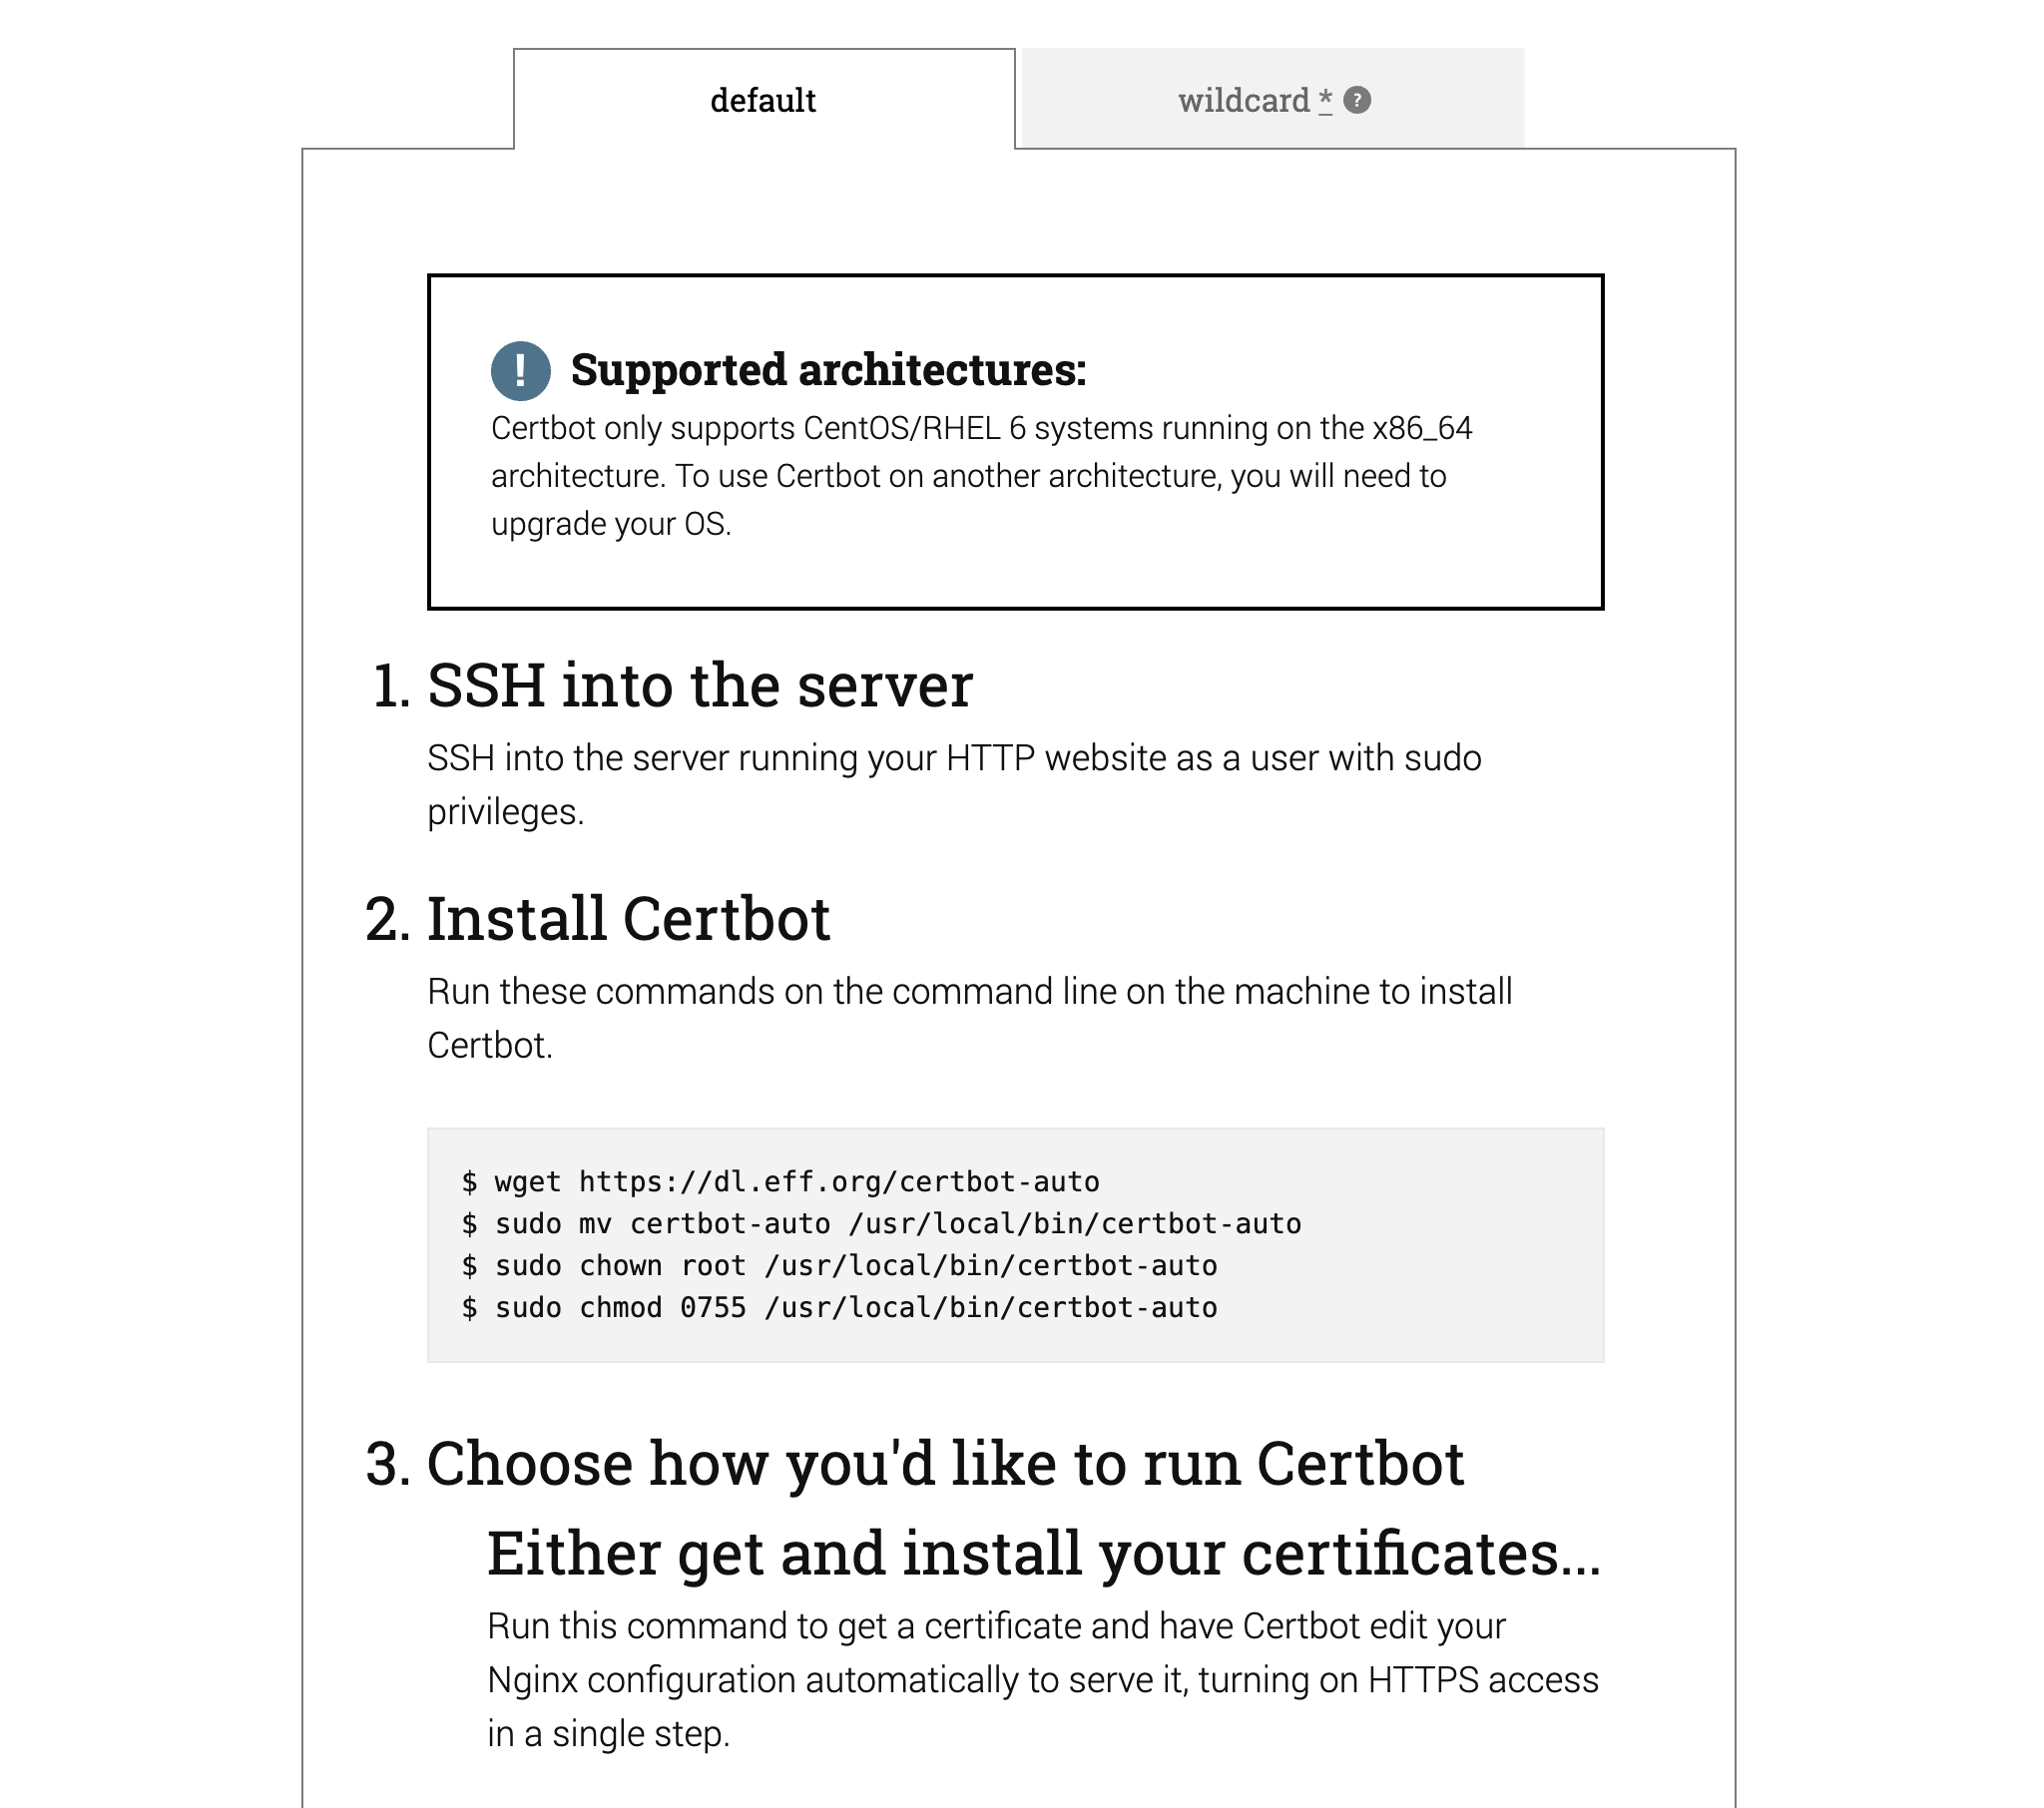

위의 내용에 따라 실제 사용한 스크립트
# certbot-auto 다운로드
$ wget https://dl.eff.org/certbot-auto

# certbot-auto 설치
$ sudo mv certbot-auto /usr/local/bin/certbot-auto
$ sudo chown root /usr/local/bin/certbot-auto
$ sudo chmod 0755 /usr/local/bin/certbot-auto

# 인증서 설치 (설치 중 나오는 내용에 따라 명령 입력)
$ sudo /usr/local/bin/certbot-auto --nginx --debug

# crontab에 인증서 갱신 추가
$ echo "0 0,12 * * * root python -c 'import random; import time; time.sleep(random.random() * 3600)' && /usr/local/bin/certbot-auto renew -q" | sudo tee -a /etc/crontab > /dev/null

# crontab 재실행
$ sudo service crond restart
여기까지 하고 나면 nginx 서버 설정 부분에 ssl관련 설정이 자동으로 들어가 있는 것을 확인할 수 있다.
사용하는 도메인이 하나인 경우엔 상관없지만 하나의 도메인에 여러개의 서브 도메인을 사용하는 경우 아래와 같이 와일드 카드 인증서를 받아 기존 인증서를 바꿔주자.
와일드 카드(*.domain.com) 발급
아래 명령에서 이메일 주소와 도메인 주소는 변경하고 터미널에서 실행한다.
certbot-auto certonly --manual --preferred-challenges=dns \
--email email-address@gmail.com \
--server https://acme-v02.api.letsencrypt.org/directory \
--agree-tos --debug --no-bootstrap \
-d *.domain.com
$ certbot-auto certonly --manual --preferred-challenges=dns \
    --email email-address@gmail.com \
    --server https://acme-v02.api.letsencrypt.org/directory \
    --agree-tos --debug --no-bootstrap \
    -d *.domain.com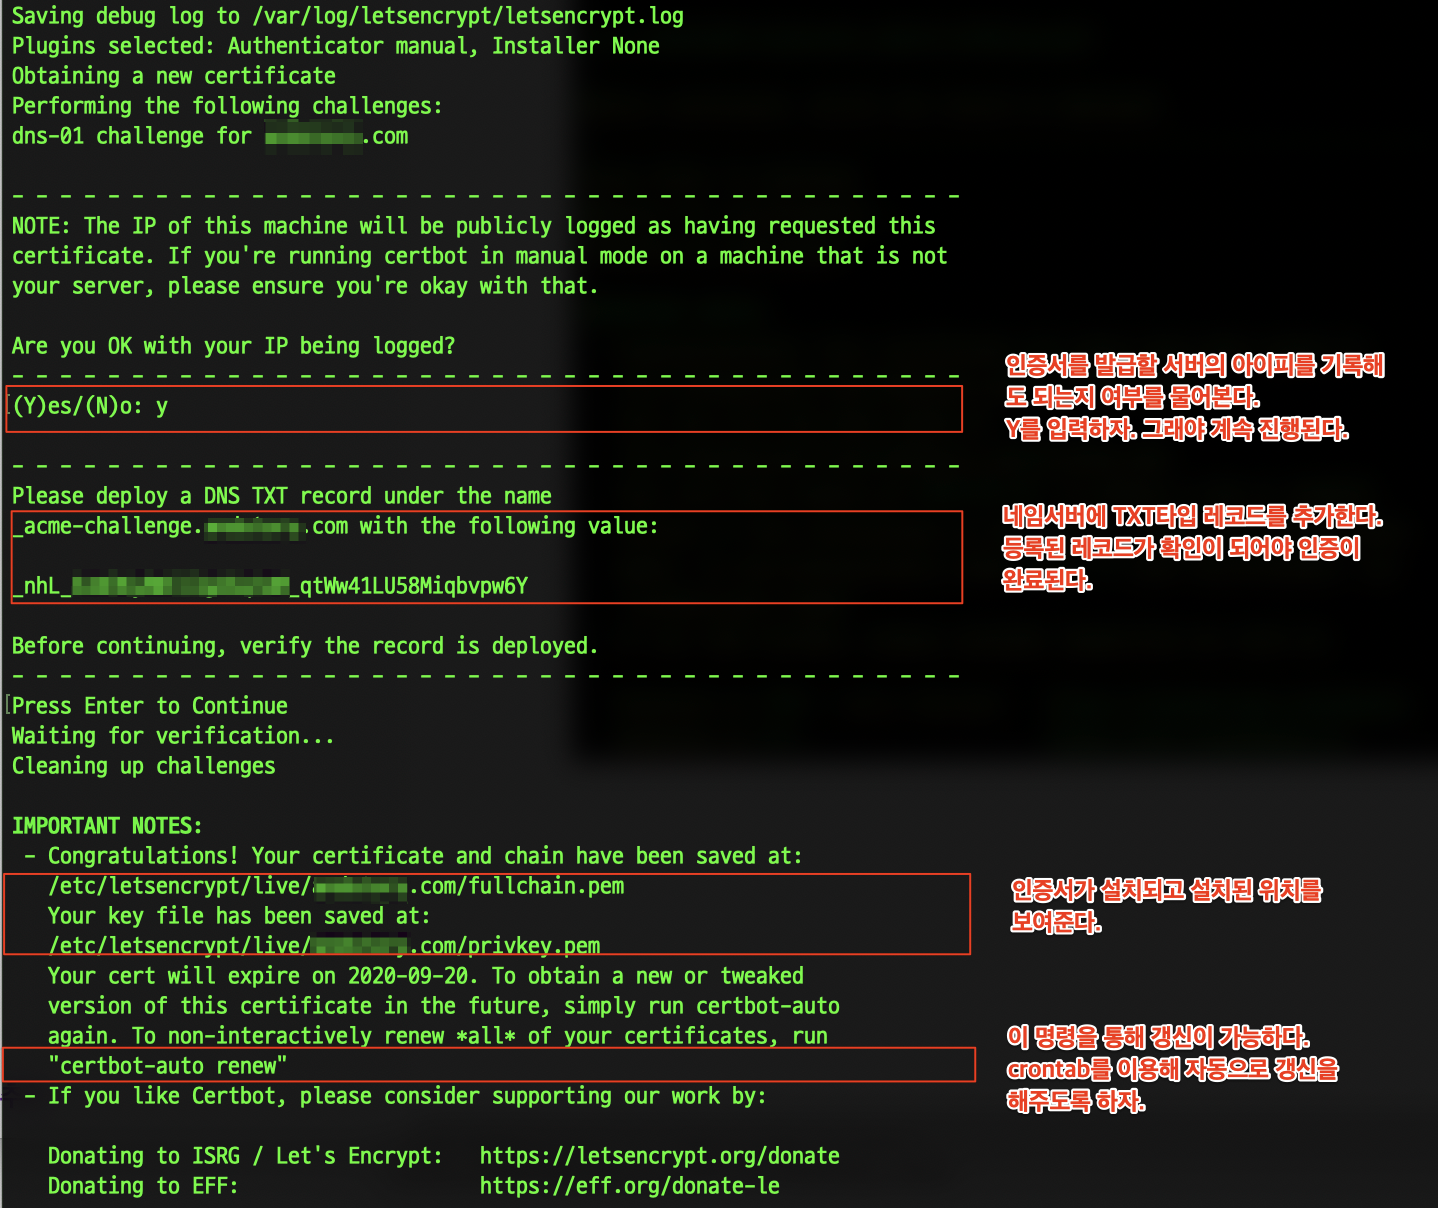
이 경우 인증서 발급만 진행되므로 nginx설정과 인증서 갱신을 위한 crontab 설정은 반드시 해주어야 한다.